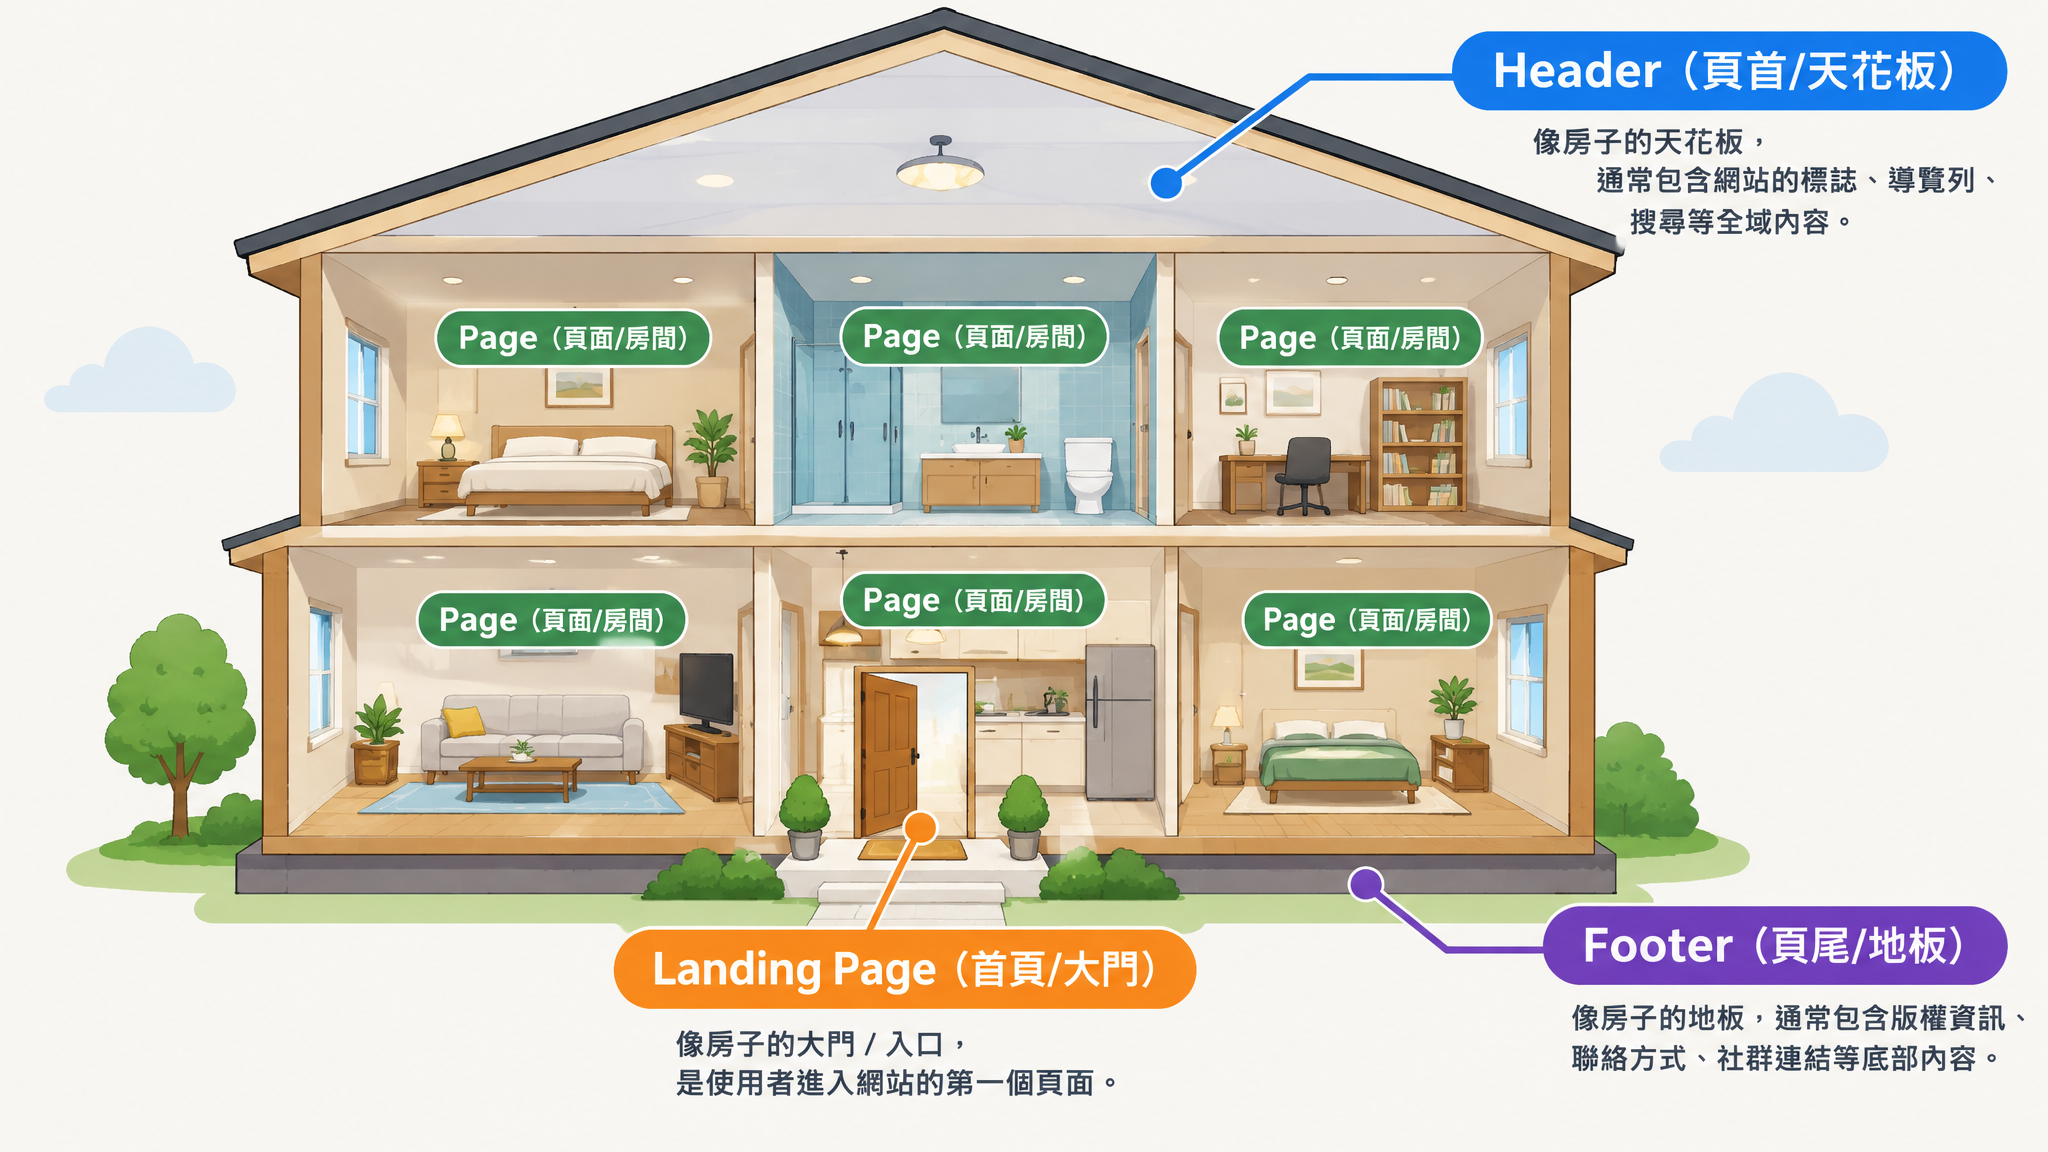

You don't need to code to build a website from scratch. Most beginners follow the same path: decide what the site should achieve and who it is for, choose a build method (a website builder, an AI tool, a CMS or hand-coding), register a domain, set up hosting, design the layout and page structure, write the content, test everything, publish, and keep updating and promoting the site. For most beginners, a website builder with built-in hosting and templates, or an AI website generator, is the fastest way to go live.
This article is a translated and restructured adaptation of a beginner's guide on the Wix blog, rewritten to give the answer first and the steps second so you can find what you need quickly. If you want to compare platform costs first, see our other article, How to Build a Website: 3 Site Types, 4 Methods, 5 Steps and Platform Costs Compared.
What are the ways to build a website?
There are 8 common ways to build a website. They differ in how much you build yourself, the skills you need and who looks after hosting and security. If you already know which method you want, skip ahead to the 10 steps below.
- Website builder with templates: the platform combines designer-made templates, hosting and business tools such as payments and bookings. You never touch code, and the platform handles updates, security and speed. This is the lowest-risk starting point for most people.
- AI website builder: you write a short description or answer a few questions, and the AI generates a first version of the pages, layout, text and images for you to edit. The draft arrives fast, but plan time to rewrite the copy, swap in your own photos and adjust offers so it reflects your brand.
- AI chat assistants (such as ChatGPT or Claude): you describe the site you want in a chat. If the assistant is connected to a website platform, it can create or manage the site there; if not, it usually only produces code that you must publish separately.
- Vibe coding and AI coding tools: you describe what you want in plain language and tools like Claude Code or Cursor write a code project that you keep refining by chat. The output is code, so it may still need debugging, a production build and somewhere to host it. For beginners, the hard part is everything after the code: putting it online, connecting a domain, setting up HTTPS and adding payments or bookings.
- Content management system (CMS): lets you create, edit and organize content without building every page from scratch, which suits blogs and content-heavy sites. You can self-host it or use a hosted service; self-hosting means you take responsibility for hosting, updates and maintenance.
- Hand-coding with HTML, CSS and JavaScript: HTML structures the page, CSS styles it and JavaScript adds interactivity, giving you full control. The trade-off is time and responsibility: responsiveness, accessibility and performance are all yours. It is a good path if you want to learn web development, but rarely the fastest way to launch a business site.
- Headless website: separates the front end visitors see from the back end that stores content and handles orders, bookings and payments. It suits developers and agencies who want a fully custom design without building a back end from scratch.
- Hiring a professional: a designer, developer or agency makes the technical decisions for you, so you trade budget for time. Agree up front on who will update the site after launch.
Costs follow the same pattern: the more you build and host yourself, the more you pay in time or developer fees instead of a single plan.
What are the 10 steps to build a website from scratch?
- Define your website's purpose
- Choose your website builder or build method
- Pick and register a domain name
- Choose a web hosting plan
- Design your site: pick a template or start with AI
- Build your site structure
- Add useful pages
- Create engaging content
- Test and launch
- Maintain and promote your website
Step 1: How do you define your website's purpose and audience?
Start by asking whether the site is for selling products, sharing expertise, building a community or showing your work. Your goal shapes every later decision, from the build method to layout, content and navigation.
- Define who the site is for: think about who will visit, what problem they want solved and what would help them choose you. Talk to existing customers, run surveys or interview potential visitors instead of guessing.
- Research competitors' websites: compare navigation, pricing clarity, calls to action and how they work on a phone, then decide what your site offers that theirs don't.
- Set measurable goals: decide which metrics matter, such as traffic, sign-ups, bookings or sales, so you know what works after launch. Note your budget and the features you need at launch too, since both narrow down which build method fits.
- Define your brand identity: write down 3 to 5 words for how the site should feel (trustworthy, playful, minimal, bold), then pick a primary color, one or two accent colors and a font pairing, and use them consistently on every page.
Common website types include business and ecommerce sites, blogs, portfolios, content and media sites, educational sites (lessons, PDFs, certifications), personal and lifestyle sites, and sites for schools and non-profits. A site can serve more than one purpose, but your main goal should always take the lead.
"Before jumping into design, take time to understand who your audience is and how they look for information. The most successful websites are built around clear user goals." — Ian Lawson, Head of User Experience at Slickplan (translated from the source article)
Step 2: Which website builder or build method should you choose?
Choose according to your goals, skills and budget. Website builders and AI website builders are usually the easiest starting points for beginners, while coding, CMS platforms and headless setups offer other levels of control and flexibility. If you choose a builder, check what the plan includes: hosting is usually built in, while a custom domain may cost extra or only come with certain plans.
Worth knowing: an AI-generated site is a starting point, not the finished product. Plan time to edit the copy, swap in your own photos and adjust layouts so the site sounds and looks like your brand.
Step 3: How do you pick and register a domain name?
Your domain is the web address visitors type to find your site. Behind the scenes, the Domain Name System (DNS) uses records to point that name to your site's IP address, and DNS also holds other records, such as the ones that route your email. A strong domain name is unique, memorable and easy to spell; avoid long names, numbers and special characters, and choose an extension (.com, .net, .org, .store) that fits your brand and audience.
- Brainstorm 5 to 10 short, memorable names that are easy to spell
- Check availability with a domain name search
- Choose an extension that fits your brand
- Register the domain (most extensions start at one year)
- Use accurate contact details and turn on two-step verification for your account
- Connect the domain to your website and update its DNS settings
Before you buy, check the renewal price after the first year, since it often differs from the opening price, and watch the expiry date so you don't lose the domain. Also keep three actions apart: registering buys the name, connecting points it to your site, and transferring moves it to a different registrar, even when one platform handles all three.
Step 4: How do you choose a web hosting plan?
Web hosting stores your site's files, images and content on a server so visitors can reach it. Keep three things apart: the domain is the address, hosting makes your files available online, and the website is the pages, content and features visitors use. Registering a domain doesn't publish anything by itself; it has to be connected to a hosted site.
If you use a website builder, hosting is usually bundled, so this step may already be done. For a site built in code, choose hosting once you know what the site needs to run. When you evaluate hosting, consider uptime, security, speed and support. The hosting type alone doesn't decide performance: configuration, caching, a content delivery network (servers around the world that keep copies of your pages) and your site's own code matter too.
Step 5: Should you design with a template or with AI?
Designing with a template: choose one for its structure and features as well as its looks. A template is a design foundation, and you can change layouts, section order, spacing, fonts, colors, buttons, images, headers, footers, menus and animations. Preview it on mobile before you commit, since layouts can shift on small screens.
Designing with AI: describe your business, target audience and the site's main goal, then specify the style you want (minimalist, bold, editorial), list the pages you need (Home, Services, About, Contact) and key features such as a booking form, and share reference sites if you have them. Don't accept the first version as it is: replace placeholder images, rewrite generic copy and adjust colors, fonts and spacing. If something feels off, give the AI specific feedback instead of starting over with a new prompt.
Designing a site built in code: with an AI coding tool, describe your brand colors, fonts, layout and reference sites, or create a mockup in a design tool first to guide it. If you write the code yourself, use HTML for structure, CSS for design and JavaScript for interaction. Whichever path you take, treat the first version as a draft and keep refining it until it looks and sounds like your brand.
For inspiration, look at competitor sites and visual platforms like Pinterest and Instagram for fonts, colors and styles. Learn from the patterns, but don't copy another site's photos, logos, text or distinctive design.
Step 6: How do you plan your site structure and menus?
A beautiful website won't succeed if visitors can't find their way around. Start with a sitemap, the blueprint of your pages, and organize content into logical sections that match your goals and audience. Then sketch each key page roughly: where the headline sits, what a visitor sees first and where the main button goes. A pen-and-paper wireframe is enough, and it matters most when you build with someone else, because it surfaces layout disagreements early.
- Menu: keep key pages easy to reach; a common rule of thumb is within about three clicks of the homepage. Prioritize the homepage, services, products and contact details, and make the logo a link back to the homepage.
- Menu style: large sites can use well-organized mega menus, while smaller ones often work best with an anchor menu that scrolls to sections on one page.
- Key content: highlight services, pricing and contact details, and use clear calls to action to guide visitors toward sign-ups, bookings or purchases.
- Footer: use it for extra links, social profiles, contact information and legal pages.
- Scalability: use flexible layouts that make adding pages easy, and review your structure regularly as the site grows.
Step 7: Which pages does your website need?
- Homepage: the face of your website. Show right away who you are and what you do.
- Shop or gallery: where visitors browse your products or services, with attention-grabbing descriptions and good photography.
- About page: your online business card. Share who you are, what you stand for and what makes you different.
- Contact section: list phone numbers, email and social links, and repeat the essentials in your footer.
- Blog: adds fresh content regularly, shows your expertise and supports your SEO.
Depending on your needs, you can also add a membership area, online courses, an FAQ page, an online booking system, a testimonials page and a custom 404 page. If your site collects personal information, uses cookies, takes payments or sells products, you will likely need a privacy policy, a cookie notice, terms of service and shipping, returns and refund policies. What is required depends on where your business and visitors are, so check the rules that apply to you (this is not legal advice).
Step 8: How do you create engaging website content?
Mix text, photos, videos and animations, and place your most important content above the fold (the part visible without scrolling) so visitors see your value immediately. Use clear headers, concise text and visuals to make content easy to scan, and avoid long blocks of text or too many effects. Use only images you have the rights to: your own photos, licensed stock, or AI-generated images whose terms allow commercial use. Once your content is ready, optimize it for search engines with titles, descriptions and clear headings.
Your content also needs to work on phones. According to StatCounter GlobalStats, mobile devices account for the majority of global web traffic, so choose mobile-friendly templates and check every page on a phone before you publish.
Make your site accessible: add descriptive alt text to meaningful images (purely decorative images can have empty alt text), use color contrast that meets accessibility guidelines, keep body text comfortably large (many designers use 16 pixels or more) and make sure every interactive element works with a keyboard. Automated scans can find common issues but cannot confirm full accessibility or legal compliance on their own. The European Accessibility Act has applied since June 2025 to specific products and services, including many ecommerce services; microenterprises that provide services are exempt. In a Level Access survey of more than 500 enterprise leaders in Germany, France, Italy and the U.K., 87% said the EAA applies to their organization, but only 66% had begun taking action to comply.
Step 9: What should you test before launching your website?
- Preview: browse the site as a visitor would, checking navigation, layout and design on desktop, smartphones and tablets, and proofread all text.
- Functionality: test every page, link, button and embedded video on desktop and mobile; submit each form to confirm the messages arrive; check that your domain connects over a secure connection (HTTPS) and that analytics records visits.
- Payments and bookings: complete a test purchase or booking from start to finish, check that confirmation emails arrive, confirm prices, taxes, shipping and availability display correctly, make cancellation and refund details easy to find, and see what happens when a payment fails or a required field is empty.
- Cross-browser check: test on popular browsers such as Chrome, Firefox and Safari.
- Load speed: Google's Core Web Vitals give useful benchmarks. Largest Contentful Paint, the moment the main content appears, should be 2.5 seconds or less for most visits. Test on a mobile connection rather than office Wi-Fi with a free tool like PageSpeed Insights. Slow pages usually come from oversized images and heavy video, so upload images at their displayed size, use modern formats, lazy-load images lower on the page and keep autoplaying video off the homepage.
- Get feedback: ask a friend or colleague to navigate the site and comment on usability, clarity and design, then make final tweaks.
When your site is ready, publish it and check that search engines can index it: confirm your settings allow indexing, verify the site in Google Search Console, submit a sitemap and watch the Page Indexing report. Google can also find sites on its own, and none of these steps guarantees indexing or rankings, which can take time.
Step 10: How do you maintain and promote your website after launch?
- Track performance: use an analytics tool to see which content performs best, and let that guide updates and promotion.
- Listen to your audience: collect feedback through surveys, forms or conversations, and combine it with analytics to refine navigation, content and features.
- Protect your site: SSL encrypts data between your site and visitors, but it doesn't protect against everything. Use strong passwords, two-step verification and user roles, keep apps and plugins updated, collect only the personal data you need, and check what your backups cover and how far back you can restore. Even on a managed platform, you remain responsible for your content, account access and privacy obligations.
- Set a maintenance routine: weekly, check that forms, orders and bookings are coming through; monthly, review analytics, fix broken links and update outdated content; every few months, review who has access, test restoring a backup and update apps and integrations.
- Drive traffic: promote your site on social media, through email marketing, guest blogging or advertising, focusing on the platforms where your audience is most active, and keep attracting visitors with SEO and a blog.
- Let AI agents handle routine work: a growing share of day-to-day work, such as drafting marketing emails, following up with leads and scheduling, can run on AI agents. What an agent can do depends on the product and the permissions you give it, so set permissions and review its output before it sends messages, books appointments or touches payments.
How much does it cost to build a website?
Costs depend on the build method, design, features, content, hosting and marketing. Custom design, advanced features like ecommerce or booking systems and professionally written content all add cost, while DIY builders keep it lower and more predictable. Budget for ongoing costs too: domain renewals, business email, premium apps or plugins, payment processing fees and content or developer updates. Over time, these often matter more than the cost of the first build. Marketing often adds more than the website itself, so start small and scale later.
As an example from the source article, Wix lets you create and publish a site for free (with a platform subdomain and branding), and a paid plan is needed to connect a custom domain and remove the branding. Paid plans start at $17 per month in the US when billed annually; prices vary by location and billing period, so check the official pricing page for current rates.
Frequently asked questions
Can anyone create a website from scratch?
Can a beginner build a website?
Can I create my own website for free?
Do I need to buy a domain before building a website?
What is the easiest way to build a website?
How do I create a website for my business?
Can AI build a website for me?
Do websites make money?
What are common challenges during a website launch?
Conclusion: think it through first, then build
Building a website from scratch is less about whether you can code and more about defining your purpose and audience first, then choosing a method that fits your skills and budget. For most beginners and small businesses, a website builder or AI tool with built-in hosting, security and templates is the most time-saving start. Then work through the domain, design, structure, pages, content and testing, and keep updating and promoting the site after launch so it keeps delivering results. If you would like AI to help you build a site, write articles and publish them through a conversation, you can also try 小C開店 (CMINI).
References
- Wix Blog: How to create a website from scratch (beginner's guide for 2026) (the source of this translated adaptation; author Allison Ko)
- web.dev: Largest Contentful Paint (LCP)
- Level Access: The State of Digital Accessibility in Europe
- Statista: Share of website traffic coming from mobile devices (StatCounter data)